If you’ve been here before, then you might notice that some changes happened around the website. Along with the new design and the redesign of our logo, a couple of other columns were created. One of those is called “Tutorials” and that’s where I will create graphic design tutorials that are easy to follow. In the first one you’re gonna learn how to make your own mockups, because even if there’s already an incredible amount of it available online, you never know when the one you need might not be available so you will just have to make your own. That’s how I started making them! 🙂
I am going to try to keep it simple and easy to follow, but if you get lost along the way, don’t hesitate to ask questions in the comments area below this article. I am going to structure and organize it into steps and lots of screenshots will be available, to make it as easy as possible to follow it.
Tools needed
I’m going to start with mentioning all of the tools I’ll be using in this tutorials and which you will need in order to follow. In order to better understand this one, I strongly suggest that you will try to recreate the same mockup as I am creating here. Here you can find the unedited picture that I have used in this tutorial.
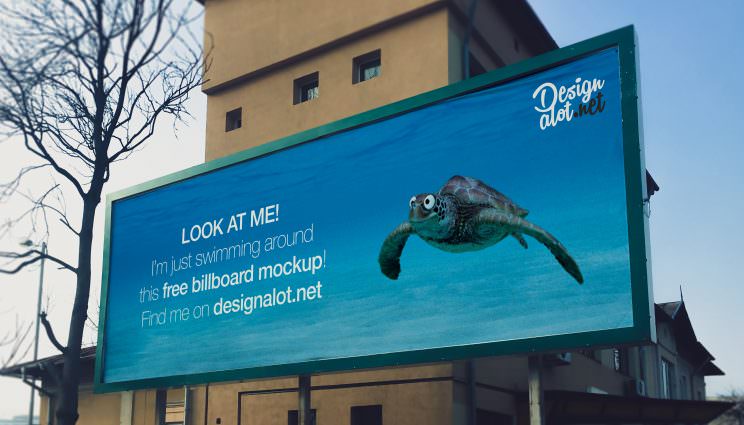
The tools that I have used to create the original mockup “Wide 3:1 Outdoor Billboard Free Mockup #1” are: iPhone 6s, Adobe Photoshop Lightroom CC and Adobe Photoshop CC (2015). But to make this one even simpler we’ll skip the Lightroom part, as it’s just optional. If you’re familiar with it, then it’s a great software to retouch your photos, but you can easily do some basic retouches in Photoshop as well. Therefore, let’s skip Lightroom.
Now, the tools you will need to create a mockup are: a digital camera or a phone with a decent camera and Adobe Photoshop CS4+ (earlier versions won’t work). But if you are just following the tutorial based on the photo I provided, then you just need Photoshop.
Let’s get started!
How to create a mockup
I have organized this tutorial in 4 basic steps, each step having a couple of points to make it easy to follow. Wherever is possible, screenshots will be added, so you won’t get lost. Keep in mind that I am using Adobe Photoshop CC 2015, which means that if you’re using a different one, the screenshots might look slightly different then what you have, but all of the features will be available for you as well.
#1 – Take a photo
First step in creating a mockup is to take a picture of the product that you want to use. For that you will need to either go outside and take a photo of something, like I did, or just use elements you have around your house or office. You can take photos of mugs, envelopes, paper, screens etc.
Once you find the element you want to create a mockup with, you’ll have to take a photo of it, which it should be as high quality and resolution as possible. For best results, I recommend you using a digital camera, because with those your picture will have a higher resolution than if you will shoot it with a phone, making it easy for you to crop it without losing quality. But if you don’t have access to a digital camera, a smartphone with a good camera would do it. I used an iPhone 6s for this mockup and I’m satisfied with the quality of the picture.
Feel free to take as many pictures as you want, until you’re satisfied with the result. You only need one photo, but that one should be great!
Once you’re satisfied with the picture you’ve taken, upload it on your computer in its original size (the bigger the better – here size does matter)!
#2 – Retouch the photo
After you’ve saved it, it’s time to start making some adjustments and retouches to it.
First step is to open the picture in Photoshop.
Convert background to smart object
The next step is to convert the background layer to smart object. In order to do so, right click the Background layer from the Layers panel and click the “Convert to Smart Object” option (like in the screenshot available to the right).
Why are we doing that?
I started doing it because this way you can easily go to the smart object and edit, duplicate or play with the background image, without affecting the structure of the mockup.
Another reason for it is that by applying filters to a smart object, you can easily edit it or delete it later. But if you apply the filters directly to the rasterized layer, you won’t be able to edit it or remove it later. You’ll be stuck with it, either you like it or not.
Open the smart object and edit the background pic
 This is an optional step, needed only if there are any details you want to remove from the background picture. If yes, just double click the smart object to open it (screenshot) and duplicate the layer (CTRL+J or Comand+J on Mac) to keep it as a backup in case you screw up the background. Once you’ve reached there, start removing any unwanted details, like: cables, people, elements, etc.
The picture I’m using in this tutorial doesn’t need any of that. I was lucky enough to find the billboard without any advertisment on it, just a blank white sheet. That’s another lucky thing, because that sheet will help me give a realistic effect to the mockup.
Once you’ve finished editing the picture, save it and return to the original file.
Set the mockup dimensions
Before we start creating applying effects or creating the artwork layer, let’s set the mockups dimensions. To do so, go to the “Image” tab from the top bar, and click on “Canvas Size” (or press Alt+Ctrl+C). Here set the dimensions you want your canvas to have. I have used 3500×2000, so you can input the same.
Now that your mockups’ dimensions have been set, select the layer, move it around and scale it to best fit your artboard.
Filters and Adjustments
Even though I sometimes edit my photos with Lightroom, I always apply some filters and adjustments in Photoshop as well.
On the adjustments we will work with Exposure, Contrast, Brightness, Gamma Correction and anything else needed to make our photo looks as great as possible.
On filters I mostly work with only two: Surface Blur and Iris Blur. The Surface Blur softens the picture and Iris Blur helps me put the focus on the main element of the mockup, by blurring the environment around it.
Let’s start with adjustments. For that you will need this pannel:
If you can’t find it, go to Window > Adjustments in the top bar.
For this mockup I have applied the Brightness/Contrast and Exposure adjustments. But you can play with the rest of them, and see which work for you.
Here are the values I used for the adjustments:
Filters
Now let’s start applying filters!
The first thing we have to do is to make sure that the layer with the background image is selected. After that, go to Filter > Blur > Surface Blur… and set the following values:
- Radius: 5 pixels
- Threshold: 15 levels
(or play around with the values until you reach a result that you’re satisfied with it)
Now’s the fun part! Applying the Iris Blur filter. Go to Filter > Blur Gallery > Iris Blur… (this is available on CC 2015 – on earlier version in might be available directly on the Filter tab). Now start playing with the filter. Here’s how I made it look:
Hit Enter and we’re done with Filters and Adjustments.
#3 – Artwork
Now it’s time to create the artwork layer. The artwork layer is the one where we’ll place future designs on the mockups.
Create a Rectangular Shape
What’s a must when creating a mockup is to know the proportions of the area where the designs will be placed. Or at least a close call to it. For this mockup I have 3:1 proportions, which means width is 3 times bigger than the height. I am not completely sure that these are the actual proportions of the billboard, but measuring it would be close to impossible, so I’ll have to stick with an approximated size.
So first thing to do here is to create a 3:1 proportions rectangular shape. Let’s start with 3000×1000 dimensions, and we’ll continue from there. Now set a 30% opacity to it so you can easily see what happening behind it, click Ctrl+T to transform it, move it to the bottom right corner of the billboard and, while holding Shift pressed, make it as tall as the billboard, like it can be seen in the below screenshot:
After that is done, press Enter.
Now go to the Layers panel, right click on the rectangle’s layer and click on “Convert to Smart Object”. Once that is done, click Ctrl+T to transform it again, and scale it in width to be as big as the billboard. While still in the Transform mode, right click on the rectangle and then click Disort. Now DRAG each point to the billboards corners, like in the below screenshot:
Once you have reached the above result, click right click and Warp to take care of final touches. Drag each margins until they’re as close to the billboard’s as possible. Now press Enter, go to Layers panel and set transparency to Multiply.
Insert test artwork
Now that the artwork layer is done, double click to open the smart object and insert a test artwork. You can just place a picture on it, doesn’t need to be an actual design. This is meant to test the mockup.
After you’ve chosen your test design, save it and get back to the mockup. Check out if all the margins are ok, if details are in place. If not, just hit transform on the artwork layer’s and do the final arrangements to it.
Once this is done, the mockup is DONE! The final result should look something like below (the design on the billboard might be the only difference):
Congratulations! You have created your first mockup!
But this isn’t done yet! Even if theoretically the mockup can be used, it’s best to keep it organized, so users would now how to use it. On the next step we’re going to organize and rename the layers.
#4 – Organize and Save
 On this point our attention moves completely to the Layers panel, which in the end should look something like the screenshot from the right side.
First of all, let’s select the adjustments layers (Brightness, Exposure and any adjustments you might have made) and group them (Ctrl+G). Now name the group Effects or Adjustments by double clicking it. After that is done, lock the group by clicking the above lock, while the group is selected.
Moving to the artwork and background. As you can see in the screenshot, there are now two layers for artwork. Why? Because the second one is as a backup, in case something is screwed up. To duplicate the artwork layer just select it and press Ctrl+J and hide it pressing the eye icon from the left side of the layer.
Now start renaming your layers. The one with the background image name it Background or Picture, the original artwork layer name it Artwork, Billboard, Your Design or any other name, and the second one name it Replace Artwork (3:1), Replace it, Your Design Here or anything to indicate to the user that that’s the layer they should use to place their design on the mockup.
Next task is to group the layers. Select the original artwork and the background layers and group them. Rename the group Background or something similar, and we’re done!
It’s time for the last step of this tutorial, saving your work! This one should be really easy and understandable, but here it is anyway. After you’ve finished all of the above steps, hit Ctrl+S and save your file as PSD.
THAT’S IT!
Congrats! Now you’re officially done! You have created your first mockup! WELL DONE!
Share your mockups
Now that you have learned how to create a mockup, get your creative flow working, and start creating mockups!
If you’ve created any and would like to share it with the world, use the Submit Freebie form and I’m gonna feature the best ones on the website!
I am also looking to see your end results based on the above tutorial and using the picture I provided, so post your final work in the comments section!
Selling your mockups
Once you’ve learned how to create your own mockups, now it’s time to learn where can you sell them!
Here’s an article that will point you to where can you sell your mockups and other digital work!
Thank you for following this tutorial!
As a bonus, you can download the final mockup file from below!
Good luck!
[emaillocker id=284] Wide Billboard Tutorial File (353 downloads ) [/emaillocker]


3 Responses
Thanks! Much appreciated.
Great tutorial!!! So easy to follow.. Thank You so much!
Thank you, Miriam! I’m glad that you liked it!